
Description
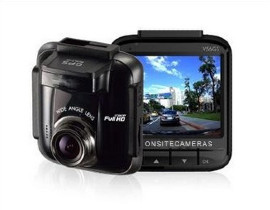
AutoCam GPS FHD V57Gs
Important Notes ©
Please take time to read these notes in conjunction with your User Manual
If you have not already received and read the User Manual for your AutoCam GPS FHD V57Gs, download the User Manual from FAQ on our website at www.onsitecameras.com/FAQ
OnSite Cameras have pre-set your new dash camera for you, see below for settings.
Getting Started
Insert the micro SD Memory Card
Insert the memory card into the micro SD slot on the side of the dash camera.
Attaching the dash camera to your windscreen
Using the windscreen suction mount (or 3M sticker mount) fit the dash camera high to the left of your windscreen. (Often the best place is close to the rear vision mirror, if your vehicle has one.) When fitted correctly the dash camera should not obscure the driver’s vision. Each State has their own legal requirements for where dash cameras can be installed please check these laws before installing and ensure that your dash cam complies. (It is illegal and dangerous to move or operate your dash camera whilst driving).
To power the dash camera
Insert the power lead into the dash camera via the mini USB port and plug the power lead into the cigarette lighter. WARNING: Do not use USB cables in your vehicle to power the dash camera, as this will result in your dash camera receiving too much voltage and will void your warranty. If you have chosen to hardwire the dash camera, ensure it is an approved hardwire kit supplied by OnSite Cameras only, and all components are tested thoroughly, by an Auto Electrician, before installation. The circuit for the hardwire kit should be the same as the cigarette lighter circuit (coming on and off with the vehicle’s power and does not stay powered 24/7). Any electrical work performed on the vehicle such as hardwire installation is done at your own risk and OnSite Cameras cannot be held responsible for any installation costs or additional costs that may be incurred after a fault or failure of dash camera, mount, hardwire kit, or car electrics. We strongly recommend that you hire a fully qualified, insured, and experienced Auto Electrician to install the hardwire kit for you. The dash camera is ONLY 5V/1A, and using a power lead not supplied by OnSite Cameras will void your warranty.
Once the dash camera is powered it will automatically come on and start recording
Format the micro SD memory card
You must format your micro SD memory card in the dash camera prior to its first use. To stop the dash camera from recording press the DOWN button and to format your SD card select Menu/File Management/Format. Press OK to start recording again. We recommend you format your micro SD memory card at least once a month. This reduces the chance of SD card errors which can cause operational malfunctions with the dash camera. WARNING: All files are permanently deleted when your micro SD card is formatted. Please ensure you have downloaded and saved any/all files that you require prior to formatting, this function cannot be undone.
Micro SD memory cards
The dash camera should always be turned off to remove or to insert the micro SD memory card. It is recommended to get an SD with SDHC Class 10 (or above). Beware of imitation or inferior micro SD memory cards they may cause operational malfunctions or permanent damage to your dash camera. Ensure you buy from reliable suppliers only.
Loop record times on micro SD memory cards
Loop recording means the dash camera continually records, in video clips of 2/3/5 minutes and re-writes over old files once the SD card is full. No vision is lost between clips as it has a no cycle save time feature. Please ensure you save any files, to your computer, you may require before the dash camera overwrites the file.
Tip: It is often a good idea to carry a spare micro SD memory card to ensure you do not overwrite vital footage before it is saved to a computer.
Approximate loop record times are shown below (Please Note: these are estimates, based on 3 minute files and to be used as a guide only. OnSite Cameras recommends you do your own testing to confirm loop record times)
| Resolution/Card Size | 16GB | 32GB | 64GB | 128GB |
| 1080P / 30fps | 2 ½ hours | 5 hours | 10 hours | 20 hours |
| 720P / 60fps | 2 hours | 4 ½ hours | 9 ½ hours | 19 hours |
| 720P / 30fps | 4 hours | 8 hours | 17 hours | 35 hours |
Note–Record times are guides only and will vary for many reasons including the brand and quality of the micro SD memory card. Imitation and inferior micro SD memory cards will not work or often fail if used.
Pre-set menu settings
OnSite Cameras have pre-set your AutoCam GPS FHD V57Gs to the settings outlined below. We recommend that you do not change any of the menu settings unless there is a specific change you require for your recording needs. To make any changes please refer to the User Manual which can be downloaded from our website at www.onsitecameras.com/faq
To access the Menu you will need to stop the dash camera from recording by pressing the DOWN arrow. You can then press the MENU button to access the Menu and make your required changes.
| Menu | Sub- Menu | Pre -set by OnSite Cameras |
| System Setting | Date Time | Set to correct time for your State |
| Screen Setting | On | |
| Voice | On (Vol 3) | |
| Language | English | |
| Default Setting | No | |
| GPS Setup | Satellite Setting | UTC of your state (Vic UTC+10, or UTC+11 DST) |
| Camera Alert | Off (this function not supported in Australia) | |
| Speed Unit | Km/h | |
| DST | Off | |
| Current Speed Display | On | |
| Overspeed Alert Tolerance | Off | |
| My Locations | Use to manually add fixed speed camera locations | |
| Overspeed Alert Management | Off | |
| Video Setting | Resolution | 1080P / 30fps |
| File format | TS | |
| Auto Record | On | |
| Recording Interval | 3 min | |
| Time Stamp | On | |
| Wide Dynamic Range (WDR) | On | |
| Function Setting | Collision Detection | Off |
| Parking Mode | Off | |
| EV | 0 | |
| Frequency Setting | 50Hz | |
| Headlight Reminder | Off | |
| Driver Fatigue Reminder | Off | |
| File Management | Playback | |
| File Delete | ||
| Remind to format card | 30 Days | |
| Format | ||
| Version |
| V57Gs Specification | ||
| DSP | SONY Sensor CMOS | |
| Apertrue | F/1.8 | |
| Lens | Front camera 6G+IR filter 155°Wide angle | |
| GPS Model | Satellite receiving module 25 x 25mm ceramic antenna patch | |
| Display | 2.4" TFT LCD color screen | |
| Resolution | 1920x1080(30fps) / 1280x720(60/30fps) | |
| Compression / Format | H.264/MOV | |
| Circular Recording | Customized 2/3/5-min interval to record every second | |
| Power supply | Car charger (INPUT:12V~24V; OUTPUT:DC5V/1.5A) built-in super capacity | |
| External Memory | Micro SD card (8GB~128GB), SDHC Class 10 or above | |
| USB Interface | USB 2.0 high speed transmission | |
| International Certification | BSMI/CE/FCC | |
| Dimension | 68 x 62 x 36.5mm (LxWxM) | |
| Weight | 90g | |
| Standard Equipment | Supporter / User Manual / USB cable | |
GPS Lock
The GPS lock is very sensitive and your AutoCam GPS FHD V57Gs dash camera needs to be as close as possible to the windscreen glass in your car/truck. GPS lock will usually be achieved in a few seconds; however can take up to 5 minutes at times (like many automatic GPS systems). Please note, the first time you use your dash camera GPS lock may take longer than normal. The dash camera will still work but the speed and GPS coordinates will not be on your video until you get GPS lock.
If your windscreen has a magnetic film on the glass, GPS lock may not be obtained or take much longer. This includes the top part of the windscreen that can have shading on it. The dash camera needs to be clear of this film.
If you drive through a tunnel or car park or under a bridge or amongst buildings you may lose GPS lock. This means you lose all GPS functions (recording of vision is not affected).
EMERG button: if this button is pressed while the dash camera is recording the file that is being recorded at the time will be saved in a protected manner. This saved file will then not be recorded over until manually deleted, or more than 10 emergency files are saved in which case it will record over the oldest emergency file. This function is only recommended for use if you can do so without taking your eyes off the road to push the button. It is often safer to simply take the micro SD memory card out after an incident has occurred and insert a spare micro SD card.
Collision detection sensitivity is set to OFF. This sensor is an in-built system that will automatically save the video clip in a protected manner where an impact or knock occurs. These clips need to be manually deleted, and if too many protected files are saved the dash camera can stop recording with or without warning. This is particularly important in trucks and heavy vehicles where vibration in the cabin is much greater than in a smaller vehicle.
Trouble Shooting
If your dash camera has a Card Full error or does not appear to be Loop Recording, save any files from your micro SD memory card that may be required and format the card. (Menu/File Management/Format)
If your dash camera will not turn on/off; remove the micro SD card and hold the on/off button down for 7 seconds to reset the dash camera. Once you have checked that it is coming back on and is getting power, turn the dash camera off to re-insert the Micro SD card, if this causes the dash camera any errors then format the card (ensure you have saved any files you may require as all files will be deleted). Then try recording again.
Watching the video on your computer
To watch your video on your PC we recommend VLC media player, as this player has the latest codecs installed. This is for the video only, not for mapping software.
To watch your video and view Google maps at the same time, you need to ensure you have Google Earth downloaded on your computer. http://www.google.com/earth/download/ge/agree.html A fast internet connection is required for Google maps to run smoothly.
Note: Only Windows computers will run the mapping software not MAC. MAC computers can still play the video from your dash camera perfectly and it will show the video and speed on the screen. However, you will not be able to watch the tracking part of the video. See our FAQ for generic map tracking software.
Your computer needs to meet the specifications noted on our website, if not it can result in jerky vision. If your video is jerky or not smooth flowing when playing from the micro SD card out of AutoCam GPS FHD V57Gs, or from the USB reader, then first transfer the video from the micro SD card to your computer via copy and paste. Then play the video directly from your hard drive.
You do not need to delete all the files on your micro SD memory card after viewing. Only delete the video files that have been saved in a protected manner (if collision detection is on) that you no longer wish to keep. The dash camera overwrites the other unprotected video files, so there is no need to delete them.
WARNINGS:
Do not attempt to modify or open this dash camera or power lead in any way. If you need to hardwire the camera you can do so but it must still run through the supplied power lead/adaptor (as the camera is only 5 volts/1Amp) and be on the same circuit as the ‘accessories’ so that it goes on and off with the vehicle ignition and does not stay powered 24/7. AutoCam GPS FHD V57Gs runs on 5 volts/1 Amp only and voltage above this will destroy the dash camera. If the dash camera or power lead has been tampered with or modified in any way the OnSiteCameras warranty will be considered null and void.
AutoCam GPS FHD V57Gs is designed to be used in an enclosed vehicle cabin only. If it is exposed to moisture, rain or excessive dust damage, OnSiteCameras will not be liable to replace or repair the device.
Warranty is not transferable.
Copyright © 2020 OnSiteCameras – All Rights Reserved.